This is default featured slide 1 title

Go to Blogger edit html and find these sentences.Now replace these sentences with your own descriptions.This theme is Bloggerized by Lasantha Bandara - Premiumbloggertemplates.com.

This is default featured slide 2 title

Go to Blogger edit html and find these sentences.Now replace these sentences with your own descriptions.This theme is Bloggerized by Lasantha Bandara - Premiumbloggertemplates.com.

This is default featured slide 3 title

Go to Blogger edit html and find these sentences.Now replace these sentences with your own descriptions.This theme is Bloggerized by Lasantha Bandara - Premiumbloggertemplates.com.

This is default featured slide 4 title

Go to Blogger edit html and find these sentences.Now replace these sentences with your own descriptions.This theme is Bloggerized by Lasantha Bandara - Premiumbloggertemplates.com.

This is default featured slide 5 title

Go to Blogger edit html and find these sentences.Now replace these sentences with your own descriptions.This theme is Bloggerized by Lasantha Bandara - Premiumbloggertemplates.com.

Sunday, 17 June 2012

Verify Your Authorship in Google


Daren Rowse

In above image you can clearly see Darren Rowse image below his blog link this is know as authorship in Google.If you also want to add your image and author name below your blog URL then this post will really helpful for you.

Authorship markup is also good for your blog SEO,It will help other search engine to find your blog author easily.It will also help you to to get more friends in your circle.Read Below Points Carefully to get authorship in Google.


Add Meta Tags


Meta Tags are very important for site.It generate all information of your blog and submit it to search engines.if you want full list of meta tags then you will get it here.But right now we only need author meta tags so just copy below code and paste it below   <b:skin><![CDATA[


<meta content='Your name' name='author'/>
<meta content='Author Email Address here!' name='Email'/>


Create About Us Page


You should create about us page in which you should give your detail .In About us Page You need to give following details-

  • Your Name
  • Your Email
  • Your Google Plus Prifile Link
  • Your Clear ans Simple Photo

 You Can See My About us Page.

Or You Can simple Add Author Details Below Every Post.For Adding author Information Below Every Post Click here.


Adding Google+ profile badge


Integrating your website with Google Plus is very good way to attract Google towards you.If you don't have account on Google plus then create it now it is very important and then add Google plus profile badge to your blog.

Just copy the below code and paste it where you want to display this badge.After copying paste replace PROFILE-ID .


<g:plus href="https://plus.google.com/PROFILE-OR-PAGE-ID" width="300" height="69" theme="light"></g:plus>


If you are blogger user then add this badge directly by going to Layout>Add gadget>Profile Badge.


Test your site on the google rich snippets


Google Rich Snippets Tool will help you to check how your page is looking on google.com They will also give you lot of information about your site Author and Google.If Author Profile URL is coming there it means your will get authorship in Google soon.


Go on above link enter your blog URL and click on preview button and result will start appearing in front of you.

Add Author Information Below Every Blog Post In Blogger


About Author

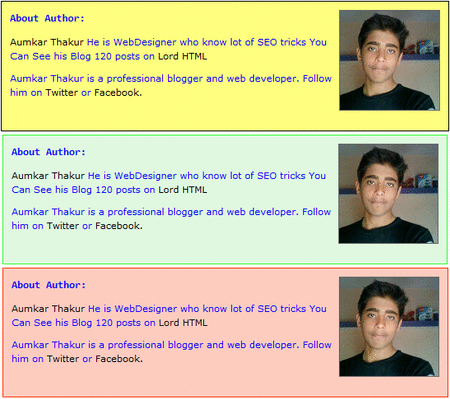
Adding Author information below post is very important if you want to verify your authorship in Google.I made this gadget it is awesome because it is having Hover effect and also active effect.In normal position color of this box will be yellow but when you mouse over it then it changes it color to green and when you click on box it will change it color to Red.

Now lets see how to add this widget to blogger blogs.


Step 1


  • Go to Blogger Dashboard > Design > Edit HTML
  • Search  ]]></b:skin> (How To Search)
  • Add below code just above  ]]></b:skin> and save template.


.author_info {
 float: left;
 width: 520px;
 padding: 10px;
 border: 1px solid #000000;
 margin-bottom: 15px;
 margin-top: 15px;
 background: #FFFF7F;
        font-family:verdana;
}
.author_info:hover {
 border: 1px solid #2EFE2E;
 background: #E0F8E0;
}
.author_info:active {
 border: 1px solid #FF3300;
 background: #FECCBF;
}
.author_info h3 {
 margin-bottom: 10px;
        font-family:consolas;
}
.author_photo {
 float: right;
 margin: 15 0 0 10px;
}
.author_photo img {
 border: 1px solid #666;
}


Step 2


  • Go to Blogger Dashboard > Design > Edit HTML
  • Search <div class='post-footer-line post-footer-line-1'/>  (How To Search)
  • Add below code just above   <div class='post-footer-line post-footer-line-1'/>  and save template.

&lt;b:if cond=&#39;data:blog.pageType == &amp;quot;item&amp;quot;&#39;&gt;
&lt;div class=&#39;author_info&#39;&gt;
&lt;div class=&#39;author_photo&#39;&gt;
&lt;img alt=&#39;author&#39; src=&#39;YOUR IMAGE URL&#39;/ height=&quot;120&quot; width=&quot;120&quot;&gt;&lt;/div&gt;
                    &lt;h3&gt;About Author:&lt;/h3&gt;              
                                        &lt;p&gt;&lt;a href=&#39;http://lordhtml.blogspot.com&#39; title=&#39;Posts by Aumkar Thakur&#39;&gt;Aumkar Thakur&lt;/a&gt; He is WebDesigner who know lot of SEO tricks You Can See his Blog  &lt;a href=&#39;http://lordhtml.blogspot.com&#39;&gt; Lord HTML&lt;/a&gt;&lt;/p&gt;
                    &lt;p&gt;Aumkar Thakur is a professional blogger and web developer. Follow him on &lt;a href=&#39;http://twitter.com/technologyblg&#39;&gt;Twitter&lt;/a&gt; or &lt;a href=&#39;http://www.facebook.com/&#39;&gt;Facebook.&lt;/a&gt;&lt;br style=&#39;clear:both;&#39;/&gt;&lt;/p&gt;
                   &lt;/div&gt;
&lt;/b:if&gt;

 I highlighted the keyword you need to change little hard but you can do it.

Saturday, 16 June 2012

Slidesnap Photography Blogger Templates With Slider

Slidesnap


From 2 day I was not publishing any post because I was busy in making this awesome blogger templates.Deepak Kamat Css expert and Author of our blog help lot to design whole body.He insert lot of dynamics features in this template.

World First Free Template With Manual Slider- Many Big photography blog like damnlol.com having good looking slider by which user can easily slide to next post without going to home.I find this type on Google but no template I find with manual slider. That's y We created this template.It is not easy task to create this manual slider it is hard work of our author Deepak Kamat .

How we create Manual Slider- With Css and Html we replace older and never link with this slider.First we make it float on left and right side of blog than we added style and hover effect on it,But which it looks awesome.


Features-


  1. 2 Coloum
  2. Right Sidebar
  3. Daynamic Navigation Menu
  4. Daynamic Popular post widget
  5. Dynamic Header
  6. Header With Hiding hover Effect.
  7. Meta Tags Added
  8. Navbar Removed
  9. Dynamic Post Title
  10. Css Manual Slider
  11. Subscribe Gadget With Css Hover Effect
  12. Latest Jqurey plug-in Added
  13. Hover Effect Labels
  14. Neat And Clean
  15. Seo Friendly


Download


This is hard work of our we will not give this template easily.This template is 100% free but you need to do little work by which you will get this template.Follow Below Steps To Get This Template

Step 1- Just Subscribe Us Via Email

Enter your email Address And Subscribe To Get This Template


Step 2- Comment Your Email Address Below We Will Send You This Template Via Email 


Screenshot-


Dynamic Header
header


Dynamic Post Title With Hover Effect
heading


Mouse Hover Effect
mouse over


Labels
labels


Css3 Navigation With Hover Effect

page navigation


Manual Slider
manual


Subscribe
subscribe


Protected


DMCA Protected You Can Redistribute or remove or edit this template.This template is only for using not for distributing.You are also not having any right to remove or change attribution Below Template.


Friday, 15 June 2012

How To Customize Blogger Labels With Css

Labels

Today I will teach you how to customize blogger labels using Css.I am sure that no other tutorial make this type of awesome good looking hover effect Labels right now.

It will change your simple blogger labels into good looking white buttons and also add hover effect by which whenever any blogger click on it hover effect will appear.

Follow Below steps to add this awesome labels to your blog-

Step 1


  • Go To Blogger Dashboard.
  • Click On Layout Tab.
  • Now Click On Add gadget.
  • Add Labels Gadget.
  • Unchecked Show Number Of Post Per Label Ans Save It.

Unchecked Show Number Of Post Per Label


Step 2


  • Go To Blogger Dashboard.
  • Click On Template Tab.
  • Search ]]></b:skin> (How To Search Code)
  • Paste Below Code Above ]]></b:skin>

/* Code By www.lordhtml.blogspot.com */

.list-label-widget-content ul
{
    list-style-type:none;
    padding-left:0px !important;
    display:inline-block !important;
}
.list-label-widget-content li {
    display:inline-block;
 }


.list-label-widget-content li a  {
color: #777;
font: 9px verdana;
text-transform: uppercase;
transition: border-color .218s;
background:
#f4f4f4;
background: -webkit-gradient(linear, 0% 40%, 0% 70%, from(
#F5F5F5), to(
#F1F1F1));
display: inline-block;
text-shadow: 0 1px 0
#fff;
-webkit-transition: border-color .218s;
-moz-transition: border .218s;
-o-transition: border-color .218s;
transition: border-color .218s;
background:
#f3f3f3;
background: -webkit-gradient(linear, 0% 40%, 0% 70%, from(
#F5F5F5), to(
#F1F1F1));
background: -moz-linear-gradient(linear, 0% 40%, 0% 70%, from(
#F5F5F5), to(
#F1F1F1));
border: solid 1px
#ccc;
border-radius: 2px;
-webkit-border-radius: 2px;
-moz-border-radius: 2px;
margin: 0 4px 4px 0;
padding: 3px 5px;
text-decoration: none;
}
.list-label-widget-content li a:hover {
color: #333;
border-color: #999;
-moz-box-shadow: 0 2px 0 rgba(0, 0, 0, 0.2) -webkit-box-shadow:0 2px 5px rgba(0, 0, 0, 0.2);
box-shadow: 0 1px 2px
rgba(0,0,0,0.15);
}

huh!! Now Save Template And Enjoy Your Awesome Label Cloud.

Thursday, 14 June 2012

Samsung Galaxy S3 Review And Price

Samsung Galaxy S3


Samsung Galaxy S3 is latest galaxy series phone from Samsung.Samsung is very confident about this phone and leaving no way to advertise this phone.In this post I will discuss some good features about his phone.

According to Samsung this mobile is inspired by water, wind, leaves, and pebbles no wonder why it arrives in Marble white and Pebble Blue color option.Samsung are saying that Galaxy S3 is design for Humans


Features


  1. Samsung Galaxy S3 is easy to handle because of classy sleek 8.55mm light weight body and it weighs about 133gm.
  2. Super AMOLED Capacitive multi-touch HD display which make mobile phone Display and Interface best.
  3. Samsung Galaxy S3 is using latest Ice cream Sandwich OS Android 4.0.4 As there Operating  System.
  4. 8 MP Camera back camera with LED flash,Burst shot, best photo, buddy photo, Face zoom, Face slideshow, Facial recognition, Minimal lag and Autofocus and 1.9 MP Front Camera for 3G and 4G.
  5. Samsung Galaxy S3 comes with 16/32/64 GB Internal Memory Model Option.we can also expand it up to 50GB.
  6. Wireless Charging option with 2,100mAh Battery.
  7. You Can Use 3G and 4G HSDPA, HSUPA, Edge, Wi-Fi, GSM, GPS and GPRS, Bluetooth and the most latest technology NFC.
  8. Pop Up Play By Which You can Play video in a window on any home-screen.
  9. By Social Tags option You Can Linked you Photo Gallery to Facebook,Google Plus,And Twitter with face recognition option.
  10. NFC feature allow users to share content such as video by tapping phones together.


Price


  • Samsung Galaxy S3 Price in India: INR 43180
  • Samsung Galaxy S3 Price in UK: �499
  • Samsung Galaxy S3 Price in Australia: $899
  • Samsung Galaxy S3 Price in USA: (For 16GB model will be $199.99 and for 32GB model, the cost would be $249.99 with a two-year contract)
  • Samsung Galaxy S3 Price in Canada: $649.99 (Assumption)


Specifications


Specifications

20 Best Touch Screen Phone By Samsung

samsung mobiles
Hey, this is guest Post by Mandleshwar Thakur.It is my first Blog Post.I am studying in Class 10th student of Indore Public School.Today I will discuss about touch screen phones by Samsung.For over 70 years, Samsung has been dedicated to making a better world through diverse businesses that today span advanced technology, semiconductors, skyscraper and plant construction, petrochemicals, fashion, medicine, finance, hotels, and more. Our flagship company, Samsung Electronics, leads the global market in high-tech electronics manufacturing and digital media.


Samsung Champ Deluxe DUOS


 Champ Deluxe DUOS

New Samsung Chanp Deluxe come into India with Dual SIM function.Its touch screen enabled 7.1cm display.Mobile is having 1.3 MP Primary Camera which is not so good but GPRS and EDGE Enabled in this mobile.Champ Deluxe Expandable Storage Capacity is 16 GB.Social life is very easy with this phone one click Facebook,twitter,and Google + are available.


Samsung Champ 2


Champ 2

Samsung 2 is having premium quality look with Primary 2 MP, 1600�1200 pixels Camera.Screen Size of Champ 2 is 240 x 320 pixels.Mobile is having lot of social networking features like Samsung Chat On,Facebook,Yahoo Messenger and other services like Google talk.Card slot-microSD, up to 16 GB and Internal-20 MB


Samsung Galaxy Y


Galaxy Y

Galaxy Y is the entry level smartphone for young generation. It comes with TouchWiz UI and 2MP Camera.Size of Screen is 320 x 240 pixels.The most important thing i love in this phone that Inbuilt Memory is 160 MB.You can expand memory by adding microSD/Trans Flash Card. Mobile Tracking and WiFi and Tethering system are available.Many Back Color are available for your mood.Operating System Used is Android 2.3

Best Buy Rs. 7,720/-*


Samsung Galaxy R


Galaxy R


The Samsung Galaxy R is more or less a downgraded version of the Samsung Galaxy S II. It comes with a 1GHz dual-core Tegra 2 chip, 4.2-inch Super Clear LCD display and a 5-megapixel camera.Operating System used is Android OS, v2.3.3 (Gingerbread).Amazing 8 GB storage, 1 GB RAM, 2 GB ROM Wow, Mobile screen size is 480 x 800 pixels, 4.2 inches (~222 ppi pixel density) with Multi Touch Facility.Mobile is having Lightning fast download speeds with HSPA+


Samsung Galaxy S Plus


Full touch bar Good Looking Mobile with 5 MP Digital Zoom camera.Mobile Internal Memory is 16 GB an expandable memory up to 32 GB.Operation System   used is Android OS 2.3 (Gingerbread) with fast Android browser.Mobile Screen Size is 10.16 cm (4.0)and mobile weight is 119 g .Mobile is having Bluetooth 3.0 ,WiFi 802.11 b/g/n and Mobile Tracker You Can Print Document with Mobile Printing.


Samsung Champ Mega Cam


 Champ Mega Cam


Cheap Phone with 1.3 MP Camera Operation System used in this mobile is SGP.Mobile Screen Size is 6.1 cm (2.4") and resolution is 320 x 240
Internal Memory of 30 MB With 1000 Phone Book Entries Expandable memory Up to 8 GB ,Bluetooth v2.1 ,Mobile Tracker,USB mass storage and other amazing features.Install Apps like Instagram and enjoy whole day :)


Samsung Star II Dous

Star II Dous

Samsung Start 2 is another Full Touch redesign model with 3.2 MP Camera Quality,Operation System used in this mobile is Proprietary and Awesome Dolphin 2.0 Browser (You Know This Browser If You Are Having Android) .Internal memory of Mobile is 200 MB and can expand up to 16 GB (MicroSD).For Entertainment mobile is having Parachute Panic (Full Version) 


Samsung Galaxy S II


Galaxy S II

4.3 Super Amoled Plus Display gorgeous color and sharper image with 8 MP Digital zoom (Back camera) / 2 MP (Front camera ) LED Flash,Auto Focus and image format is JPEG. Bluetooth BT 3.0 + HS

1080p Recording / Playing / Social Hub / Music Hub / Readers Hub / Game Hub

Mobile Also having Full Touch And Running on operating System Andorid 2.3 (Gingerbread) with  Android Browser.


Samsung Corby II 


Corby II
The Samsung Corby II S3850 is a touchscreen bar phone with a minimalist design and supports 2 MP Camera with Video Playback and Recording. The Corby II camera has an image resolution of 1200 x 1600 pixels and digital zoom.Corby II S3850 has equipped with a 3.14-inch touch screen TFT, QVGA resolution (240 x 320 pixels), 256.000 colors and the dimension of 109.9 x 66.6 x 11.7 mm.READ MORE


Samsung Champ Duos


Champ Duos
If this looks eerily familiar, it is because the Samsung Champ Duos is really just an update to an older Champ, with virtually no cosmetic enhancements. Measuring at 99.9 x 54.9 x 13 mm and weighing 88 grams, this sleek little device does however mirror some of the design traits of its more powerful and bigger cousins. 

Camera Quality is 1.3 MP not so good.Samsung decided to go for a 2.6-inch resistive touchscreen that packs in 240 x 320 pixels in resolution.read more


Samsung Galaxy Pop CDMA


Galaxy Pop CDMA

The new Samsung Galaxy Pop CDMA is a Android Smartphone with CDMA network support . Galaxy Pop CDMA is the CDMA version of the Samsung Galaxy Pop mobile . Powered by the Android 2.2 OS, this 320�240 capacitive touchscreen device shares the same specifications as its GSM counterpart with an 600MHz processor and 3.15MP camera.


Samsung Star II


 Star II

3.0 inch 240�400 pixel TFT Touch screen display12.4 mm thick and weighs 94g3.2 Mega pixel camera3.5mm audio jack, Music player with DRM support and 3D Sound TechnologyFM Radio with RDS and recordingOffice Document Viewer that supports MS Office 2007, PDF and text files and offline e-mail support with MS Exchange.GPRS, EDGE, Bluetooth v 3.0 and Wi-Fi b/g/n connectivity support30MB internal memory, expandable up to 16GB with MicroSDPre-installed Java games edge and panic1000 mAh Battery with up to 9 hrs 40 mins talk time and 900h standby.


Samsung Galaxy S (LCD)


Galaxy S (LCD)

We are talking a new screen, a new CPU and a different battery here. Although it�s actually hard to notice a difference on the outside, save for a slightly thicker body. Basically most of the internals have been replaced, which may have or may have not resulted in a significant change in the user experience.See More


Samsung Galaxy Fit


Galaxy Fit
Samsung Galaxy Fit Full Touch + Virtual QWERTY Working on Android 2.2 Operating system this mobile having 5 MP Camera with 3x digital zoom 
Read Full Mobile Review by going to here


Samsung Galaxy Ace


Galaxy Ace
  1. SIM: GSM, Single SIM
  2. Screen size: 3.8" TFT
  3. Dimension: 62.2 x 118.3 x 10.5mm
  4. Weight: 122g
  5. Internal memory: 4GB
  6. Expandable memory: 32GB
  7. Processor: 800MHz, Dual Core
  8. Connectivity Features
  9. Bluetooth V3.0
  10. Wi-FI/Wi-Fi Direct
  11. USB 2.0
  12. 5 Megapixel Camera


    Samsung Galaxy Pop S5570


    Galaxy Pop S5570
    Samsung Galaxy Pop is Full Touch Bar Device very nice phone i never got any problem with this Android 2.2 OS.It is having 3 Megapixel Camera with 3x Digital Zoom,Display Size is 240 x 320 QVGA Display Resolution

    External Memory (MicroSD up to 32 GB)


    Samsung Star Duos


     Star Duos


    First Dual Sim Touch Screen phone from Samsung.3.5G + 2.5G Dual Standby with Full Touch Experience.It is having MS Office All your mobile business needs encapsulated in one device. 5 Megapixel Camera with Flash Supported.Running on SHP OS,270 MB User Memory and External Memory (MicroSD up to 8 GB)


    Samsung Wave 525


    Wave 525
    The back hosts the 3MP camera, and replaces the usual glossy black plastic Samsung is using in most of its handsets of late for a dotted pattern one, which makes the phone less slippery to handle. The phone lies comfortably in the hand, and is fairly thin and light at 4.31 x 2.17 x 0.47� (109.5 x 55 x 11.9 mm), and 3.53 oz (100 g) of weight. The back cover is pretty prone to smudges and visible marks from everyday use, despite that it is not glossy plastic, but a simple wiping takes it all away. The Samsung Wave 525 will be available in three colors - black, white and pink.


    Samsung Star Next


    Star Next

    The Samsung Star S5230 was initially introduced along with the Samsung Preston S5600, both meant for people on tight budget. What the manufacturer is striving to achieve is get a chunk of the mainstream market with both phones targeting people who need the comfort of a modern touch sensitive screen device that offers up to date functionality at a decent price tag. Read More


    How To Add Meta Tags For Each Post In Blogger

    meta tags


    Meta tag are very important for any blog in olden day's I was adding meta tags by posting code but now blogger made it easy for blogger to add meta tags.In this post i will teach you how to add meta tags to blog and also to each post in blogger.


    Adding Meta Tags To Blog


    • Go to blogger Dashboard
    • Click On Settings Tab
    • Now Click On Search Preference
    search

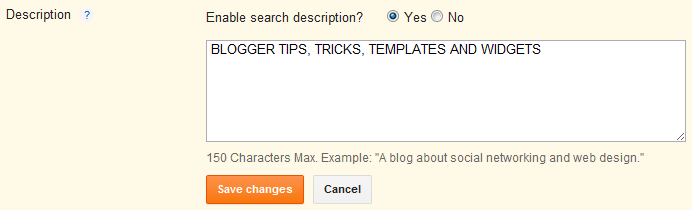
    • Now Enable search Description And Write your blog description there.

    description


    • After Adding Description Save It.


    Adding Meta Tags To Each Blog Post


    After doing above steps whenever you will post any new post click on search description tab and add post description there and save it.If you are having any problem see below picture.


    click on image to make it big


    How To Increase Blog Width Without Blogger Template Designer

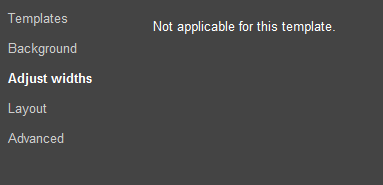
    Many blogger templates are not having any option to increase blog with directly.Tomorrow when I was chatting with my friends on Google Plus he told me that he want to increase width of his blog but there is no option available so I write this post to show you how to increase your blog width from html coding.

    No Option Available


    Increasing Blog Width With HTML


    • Go To Blogger Dashboard.
    • Now Click On Template Tab.
    • Now Click On Edit HTML button.
    • Tick Expand Widget
    • Now Search Following Code (How To Search Code)

    #outer-wrapper {
    width: 0000px;
    margin:0 auto;
    padding:10px;
    text-align:left;
    font: $bodyfont;
    }
    #main-wrapper {
    width: 0000px;
    margin-left: 20px;
    float: left;
    word-wrap: break-word; /* fix for long text breaking sidebar float in IE */
    }
    #sidebar-wrapper {
    width: 0000px;
    float: right;
    word-wrap: break-word; /* fix for long text breaking sidebar float in IE */
    }
    #newsidebar-wrapper {
    width: 0000px;
    float: left;
    word-wrap: break-word; /* fix for long text breaking sidebar float in IE */
    }
    #header-wrapper {
    width:0000px;
    margin:0 auto 10px;
    border:0px solid $bordercolor;
    }


    Now Replace  width: 0000px;  with width you want and save template.

    For example If I want to make my blog 1000px wide then i will replace width with width: 1000px;


    Wednesday, 13 June 2012

    Reason Shows That You Are Still a Beginner in Blogging


    Blogger

    I saw many blogger and many of them are good and some of them are still beginners but whenever i give them advice they say "Shut Up I am better than You" So I write this post to show you how I judge them as beginner bloggers.

    Blogging is not a game you need to make your blog as perfect as you can.

    Practice does not make perfect. Only perfect practice makes perfect.


    Checking Blog Status Everytime


    If you are checking your blog status every-time then this shows you are beginner,Just don't write any content for getting traffic just write post for getting good response from others.As I always say you that content is king if your blog is containing good amount of content then you will get lot of traffic without any advertisement.


    Changing Blog Template Every Week


    I saw many blogger changing there blogger template every time this is not good for seo and your blogger visitors.You should choose Unique template for your site and make your site template permanent.

    If you want some good template see out template gallery


    Starting Blog Post with hello,hi,hey....


    Visitor don't visit your blog to do hello hii with you, facebook is there to do this all actvity you should come directly to main topic It will save your time and reader time too


    Long Delays Between Updates


    You are giving real-time updates when live blogging. You don�t have to do minute by minute updates, but don�t let more than five minutes pass between updates. You are guaranteed to lose your audience. And, you may get bored and distracted.

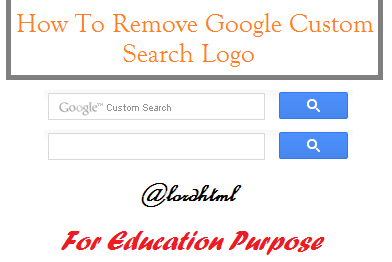
    How To Remove Google Custom Search Logo


     I am geek always want to share some good knowledge with you.I just decided to remove Google custom search watemark,after thinking lot i just made on line Css code and success to remove this logo.

    To Remove this Logo Follow Below Steps-

      1. Go to your Blogger dashboard
      2. Now Click On Template Tab.
      3. Now Click On Edit HTML Button.
      4. Find  ]]></b:skin>
      5. Paste Below Css Code Above It and save click on save template button.


      .gsc-input{background:none !important}


      Should I remove this Logo?


      Not at all you should not do this action.This is totally illegal this is only for premium users if you want to remove logo then sigh up and purchase premium account.


      Numbered Page Navigation For Blogger With Css Hover Effect


      Numbered

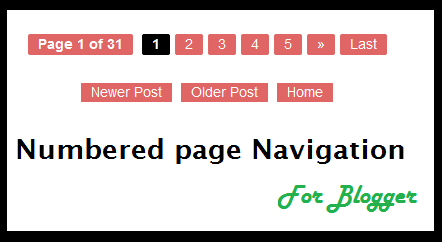
      This is awesome page navigation for blogger with Css hover effect even I am also using this widget for my blog you can see this at last of my blog.

      This only don't add numbered but i also modify post older,home and newer links.

      To add this widget to your blog follow below steps-


      Step 1


      1. Go to Design > Edit HTML > Check mark Expand Widget Templates and Find <b:includable id='mobile-index-post' var='post'>
      2. Paste below code before the above line.

      <b:includable id='page-navi'>
      <div class='pagenavi'>
      <script type='text/javascript'>
      var pageNaviConf = {
      perPage: 7,numPages: 5,firstText: &quot;First&quot;,
      lastText: &quot;Last&quot;,
      nextText: &quot;&#187;&quot;,
      prevText: &quot;&#171;&quot;
      }
      </script>
      <script src='http://awesome-navigation.googlecode.com/files/onlinetrick.js' type='text/javascript'/>
      <div class='clear'/>
      </div>
      </b:includable>


      Step 2


      1. Now Find This Code <b:include name='nextprev'/>
      2. Replace <b:include name='nextprev'/>  code with following code.


      <b:if cond='data:blog.pageType == &quot;index&quot;'>
      <b:include name='page-navi'/>
      <b:else/>
      <b:if cond='data:blog.pageType == &quot;archive&quot;'>
      <b:include name='page-navi'/>
      </b:if>
      <b:else/>
      <b:if cond='data:blog.pageType == &quot;item&quot;'>
      <b:include name='nextprev'/>
      </b:if>
      </b:if>


      Step 3


      1. Find ]]></b:skin> and copy the below code and paste before the ]]></b:skin>


      #blog-pager, .pagenavi {
           clear: both;
           text-align: center;
           margin: 30px auto 10px;
      }
      #blog-pager a, .pagenavi span, .pagenavi a {
           margin: 0 5px 0 0;
           padding: 2px 10px 3px;
           text-decoration: none;
           color: #fff;
           background: #e06666;
           -moz-border-radius: 2px;
           -khtml-border-radius: 2px;
           -webkit-border-radius: 2px;
           border-radius: 2px;
      -webkit-transition: all .3s ease-in;
      -moz-transition: all .3s ease-in;
      -o-transition: all .3s ease-in;
      transition: all .3s ease-in;
      }
      #blog-pager a:visited, .pagenavi a:visited {
           color: #fff;
      }
      #blog-pager a:hover, .pagenavi a:hover {
           color: #fff;
           text-decoration: none;
           background: #000;
      }
      #blog-pager-older-link, #blog-pager-newer-link {
           float: none;
      }
      .pagenavi .current {
           color: #fff;
           text-decoration: none;
           background: #000;
      }
      .pagenavi .pages, .pagenavi .current {
           font-weight: bold;
      }
      .pagenavi .pages {
           color: #fff;
           background: #e06666;
      }

      Now Click Save Template and enjoy!!! 


      Comment if you like this post

      Tuesday, 12 June 2012

      New Facebook Popout Likebox Version 3

      Click Me

      Hover above image to see live demo it is just wesome widget for blogger.I already give you this type of widget for blogger.But now a day's every one is adding same link box to there blog so I decided to give you some thing different.

      You can also try this for other social media like-

      1. Twitter
      2. Pinterest
      3. Facebook old One
      4. Google Plus


      Installing


      • Go to Design-> Page Elements Click on Add Gadget.
      • Select HTML/Javascript from it
      • Leave title as blank ,Copy and Paste the below code into the content section.

      <script type="text/javascript">
      /*<![CDATA[*/
      jQuery(document).ready(function() {jQuery(".noopslikebox").hover(function() {jQuery(this).stop().animate({right: "0"}, "medium");}, function() {jQuery(this).stop().animate({right: "-250"}, "medium");}, 500);});
      /*]]>*/
      </script>
      <style type="text/css">
      .noopslikebox{background: url("https://blogger.googleusercontent.com/img/b/R29vZ2xl/AVvXsEjz5jnakT9YdjEERd_pUMBVAF1iudmDWwAizqXV3iYx5IVmeGjzL3_8CyhG-G1GYK6raaRM6zmVcb1cEryFsmuUI0gxcz4_BtGi7vEl2FfPO4c-FkZ_yzD098XArpgVuXX9Ah765Ncf6O4/s1600/fb_static+button.jpg") no-repeat scroll left center transparent !important;display: block;float: right;height: 270px;padding: 0 5px 0 46px;width: 245px;z-index: 999;position:fixed;right:-250px;top:20%;}
      .noopslikebox div{border:none;position:relative;display:block;}
      .noopslikebox span{bottom: 12px;font: 8px "lucida grande",tahoma,verdana,arial,sans-serif;position: absolute;right: 7px;text-align: right;z-index: 999;}
      .noopslikebox span a{color: gray;text-decoration:none;}
      .noopslikebox span a:hover{text-decoration:underline;}
      </style>
      <div class="noopslikebox">
          <div>
          <iframe src="http://www.facebook.com/plugins/likebox.php?href=http://www.facebook.com/lordhtml&amp;width=245&amp;colorscheme=light&amp;show_faces=true&amp;connections=9&amp;stream=false&amp;header=false&amp;height=270" scrolling="no" frameborder="0" scrolling="no" style="border: medium none; overflow: hidden; height: 270px; width: 245px;background:#fff;"></iframe>
          </div>
      </div>

      Replace the RED highlighted text with your Facebook page URL. 

      Customize backgrounds colors of Lightbox in blogger with Css


      Blogger LightBox

      Hey Friends Today i will teach you how to customize light box background color in blogger with Css.This is very helpful post for photography bloggers.

      What is light box?

      Whenever you are opening any image in blogger then it opens in lightbox and it default color is black but in this post I will teach you how to edit lightbox background.

      There's no other customization for the lightbox other than turning it on or off, but believe me as a web designer it's not impossible for me to customize it.


      1. Go to your Blogger dashboard
      2. Now Click On Template Tab.
      3. Now Click On Edit HTML Buton.
      4. Find  ]]></b:skin>
      5. Paste Any of Below Css Code Above It.

      Style 1


      To Add this style paste below css code there.

      .CSS_LIGHTBOX_BG_MASK
      {
      background-color:gainsboro !important;
      background-image:-webkit-radial-gradient(center,rgba(255, 255, 255, 0.83),rgba(63, 65, 63, 0.76),rgba(0, 0, 0, 0.87)) !important;
      background-image:-moz-radial-gradient(center,rgba(255, 255, 255, 0.83),rgba(63, 65, 63, 0.76),rgba(0, 0, 0, 0.87)) !important;
      }
      .CSS_LIGHTBOX_FILMSTRIP {
      background-color: rgba(0, 0, 0, 0.411) !important; /* The bottom bar */
      }


      Style 2


      To Add this style paste below css code there.


      .CSS_LIGHTBOX_BG_MASK
      {
      background-color:gainsboro !important;
      background-image:-webkit-radial-gradient(center,rgba(255, 255, 255, 0.83),rgba(63, 65, 63, 0.76),rgba(0, 0, 0, 0.87)) !important;
      }
      .CSS_LIGHTBOX_FILMSTRIP {
      background-color: #F0F8FF !important; /* The bottom bar */
      }

      Style 3


      To Add this style paste below css code there.


      .CSS_LIGHTBOX_BG_MASK {
      background-color: rgba(14, 97, 143, 0.28) !important;
      background-image: -webkit-radial-gradient(top,rgba(221, 235, 255, 0.77),rgba(207, 230, 255, 0.6) ,rgba(83, 83, 83, 0.42)) !important;
      background-image: -moz-radial-gradient(top,rgba(255, 255, 255, 0.77),rgba(203, 255, 234, 0.6) ,rgba(34, 146, 83, 0.42)) !important;
      background-image: -ms-radial-gradient(top,rgba(255, 255, 255, 0.77),rgba(203, 255, 234, 0.6) ,rgba(34, 146, 83, 0.42)) !important;
      }
      .CSS_LIGHTBOX_FILMSTRIP {
      background-color: rgba(101, 122, 231, 0.43) !important;
      background-position: 10px 0px;
      background-size: 115px 60px;
      background-image: -webkit-linear-gradient(315deg,transparent,transparent 33%,rgba(0, 0, 0, 0.12) 33%,rgba(0, 0, 0, 0.12) 66%,transparent 66%,transparent);
      background-image: -moz-linear-gradient(315deg,transparent,transparent 33%,rgba(0, 0, 0, 0.12) 33%,rgba(0, 0, 0, 0.12) 66%,transparent 66%,transparent);
      background-image: -ms-linear-gradient(315deg,transparent,transparent 33%,rgba(0, 0, 0, 0.12) 33%,rgba(0, 0, 0, 0.12) 66%,transparent 66%,transparent);
      -webkit-transition:all 0.6s ease-in-out;
      -moz-transition:all 0.6s ease-in-out;
      -o-transition:all 0.6s ease-in-out;
      -ms-transition:all 0.6s ease-in-out;
      transition:all 0.6s ease-in-out;
      }
      .CSS_LIGHTBOX_FILMSTRIP:hover {
      background-color: #7081DA !important;
      }
      .CSS_LIGHTBOX_FILMSTRIP {
      background-color: #A04343; /* The bottom bar */
      }

      All Credits Go To Deepak Kamat (Author Of Our Blog)

      Comment if You Like This Post

      Scrolling Popular Post Gadget For Blogger


      Blogger

      Hey friends this is very good post I am sure you will love this post.In this post I will give you two method by which you can make your blog simple popular post widget into animated scrolling popular post widget.This both popular post widgets are very cool change automatically with nice css effect.This Widget is made by Abu Farhan and Mohammad Mustafa Ahmedzai.You should follow below steps carefully because many other blogger face problem while adding codes.If you don't know basic of adding codes then see this post (How to find code in blogger)


      Scrolling Popular Post Widget Style 1


      1. Go To Blogger >>> Design
      2. Click add a gadget
      3. Choose Popular Posts Widget provided by blogger
      4. Keep post number greater than 4
      5. Save your widget
      6. Now select an HTML/Javascript widget
      7. Paste the following slide code inside it,


      <style type="text/css" media="screen">
      #PopularPosts1 {
      overflow:hidden;
      margin-top:5px;
      width:100%;
      padding:0px 0px;
      height:310px;
      }
      #PopularPosts1 ul {
      width:310px; 
      overflow:hidden;
      list-style-type: none;
      padding: 0px 0px;
      margin:10px 0px 0px 10px;
      }
      #PopularPosts1 li {
       width:290px; 
      padding: 5px 5px;
      margin:0px 0px 5px 0px;
      list-style-type:none;
      float:none;
      height:80px;
      overflow: hidden;
      background:#fff url(https://blogger.googleusercontent.com/img/b/R29vZ2xl/AVvXsEjHlwLMb4IjMNNid1E2vj7BpGzeG8x44SOghfeypM1fiYGaFoXjsvlG5xNrJObwTd2h9avK_J38qMGKhHfKSMGBn6sJQe-nivocsNaKpyxJIyX6X_YP5YOommoxEzf932x8KGkNuunxY8U/s400/popular+posts.jpg) repeat-x;
      border:1px solid #ddd;
      }
      #PopularPosts1 li .item-title {
       
          font-size:1em;
          margin-bottom:0.5em;
      }
      #PopularPosts1 li .item-title a {
      text-decoration:none;
      color:#7CA2C4;
      font:bold 12px verdana; 

      height:18px;
      overflow:hidden;
      margin:0px 0px;
      padding:0px 0px 2px 0px;
      }
      #PopularPosts1 li img {
      float:left;
      margin-right:5px;
      background:#EFEFEF;
      border:2px solid #7CA2C4; 
      }
      #PopularPosts1 li .item-snippet {
        overflow:hidden;
      font-family:Tahoma,Arial,verdana, sans-serif;
      font-size:10px;
      color:#289728;
      padding:0px 0px;
      margin:0px 0px;
      }
      #PopularPosts1 .item-snippet a,
      #PopularPosts1 .item-snippet a:visited {
          color:#3E4548;
          text-decoration: none;
      }
      #PopularPosts1 .spyWrapper {
          height: 100%;
          overflow: hidden;
          position: relative;
      }
      #PopularPosts1 {
          -webkit-border-radius: 5px;
          -moz-border-radius: 5px;
      }
      .tags span,
      .tags a {
          -webkit-border-radius: 8px;
          -moz-border-radius: 8px;
      }
      a img {
          border: 0;
      }
      -->
      </style>
      <script src="http://ajax.googleapis.com/ajax/libs/jquery/1.6.2/jquery.min.js" type="text/javascript"></script>
      <script type="text/javascript" charset="utf-8">
      $(function () {
          $('.popular-posts ul').simpleSpy();
      });
      </script>
      <script src="http://accordion-for-blogger.googlecode.com/svn/trunk/simplespy.js" type="text/javascript"></script>


      Keep the two widgets together. One on top of another as shown below,   

      Keep Both Widget Together


      Scrolling Popular Post Widget Style 2


      1. Go To Blogger >>> Design
      2. Click add a gadget
      3. Choose Popular Posts Widget provided by blogger
      4. Keep post number greater than 4
      5. Save your widget
      6. Now select an HTML/Javascript widget
      7. Paste the following slide code inside it,


      <style type="text/css" media="screen">
      #PopularPosts1 {
       overflow:hidden;
      margin-top:5px;
      padding:0px 0px;
      height:400px;
      }
      #PopularPosts1 ul {
      width:220px;
      overflow:hidden;
      list-style-type: none;
      padding: 0px 0px;
      margin:0px 0px;
      }
      #PopularPosts1 li {
       width:208px;
      padding: 5px 5px;
      margin:0px 0px 5px 0px;
      list-style-type:none;
      float:none;
      height:80px;
      overflow: hidden;
      background:#fff url(http://i879.photobucket.com/albums/ab351/bloggerblogimage/blogger/post.jpg) repeat-x;
      border:1px solid #ddd;
      }
      #PopularPosts1 li .item-title {
          color:#A5A9AB;
          font-size:1em;
          margin-bottom:0.5em;
      }
      #PopularPosts1 li .item-title a {
       text-decoration:none;
      color:#4B545B;
      font-size:11px;
      height:18px;
      overflow:hidden;
      margin:0px 0px;
      padding:0px 0px 2px 0px;
      }
      #PopularPosts1 li img {
       float:left;
      margin-right:5px;
      background:#EFEFEF;
      border:0;
      }
      #PopularPosts1 li .item-snippet {
        overflow:hidden;
      font-family:Tahoma,Arial,verdana, sans-serif;
      font-size:10px;
      color:#262B2F;
      padding:0px 0px;
      margin:0px 0px;
      }
      #PopularPosts1 .item-snippet a,
      #PopularPosts1 .item-snippet a:visited {
          color:#3E4548;
          text-decoration: none;
      }
      #PopularPosts1 .spyWrapper {
          height: 100%;
          overflow: hidden;
          position: relative;
      }
      #PopularPosts1 {
      -webkit-border-radius: 5px;
      -moz-border-radius: 5px;
      }
      .tags span,
      .tags a {
      -webkit-border-radius: 8px;
      -moz-border-radius: 8px;
      }
      a img {
          border: 0;
      }
      -->
      </style>
      <script src="http://ajax.googleapis.com/ajax/libs/jquery/1.6.2/jquery.min.js" type="text/javascript"></script>
      <script type="text/javascript" charset="utf-8">
      $(function () {
          $('.popular-posts ul').simpleSpy();
      });
      </script>
      <script src="http://accordion-for-blogger.googlecode.com/svn/trunk/simplespy.js" type="text/javascript"></script>


      Keep the two widgets together. One on top of another as shown below,   


      Comment If You Like This Post