This is default featured slide 1 title

Go to Blogger edit html and find these sentences.Now replace these sentences with your own descriptions.This theme is Bloggerized by Lasantha Bandara - Premiumbloggertemplates.com.

This is default featured slide 2 title

Go to Blogger edit html and find these sentences.Now replace these sentences with your own descriptions.This theme is Bloggerized by Lasantha Bandara - Premiumbloggertemplates.com.

This is default featured slide 3 title

Go to Blogger edit html and find these sentences.Now replace these sentences with your own descriptions.This theme is Bloggerized by Lasantha Bandara - Premiumbloggertemplates.com.

This is default featured slide 4 title

Go to Blogger edit html and find these sentences.Now replace these sentences with your own descriptions.This theme is Bloggerized by Lasantha Bandara - Premiumbloggertemplates.com.

This is default featured slide 5 title

Go to Blogger edit html and find these sentences.Now replace these sentences with your own descriptions.This theme is Bloggerized by Lasantha Bandara - Premiumbloggertemplates.com.

Showing posts with label Feedburner. Show all posts

Wednesday, 30 May 2012

Feedburner Feed Count With Subscription Button

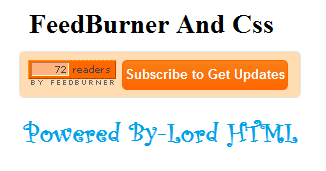
If you are our daily reader then you should know that we already teach you how to add feedburner feed count button to blogger ,From many day's i was thinking idea to make this count button more attractive now i got it.i added butifull subscription button to this gadget by which user can easily subscribe via email.So in this post I will give you this widget.

feedburner


Installation


  • Go to blogger dashboard.
  • Click on layout tab.
  • Now add html/javascript with the help of add gadget.
  • Paste the following code inside it and save it .

<style>
.rssbuttontable
{
border: 1px solid #E6E6E6;
background: #FFDCB1;
float: center;
width: 265px;
margin:0px 0 0 0px;
padding: 5px 5px 5px 5px;
border-radius: 5px;
-moz-border-radius: 5px;
height: 35px;
float: left;
display: inline;
}
input.Subscriberssbutton
{
background:-moz-linear-gradient(top,#F88017 0%,#FF6600 100%); background:-webkit-gradient(linear,left top,left bottom,from(#F88017),to(#FF6600));
border: 1px solid #FF6600;
text-transform: none;
font:bold 13px arial;
 color: #fff;
height: 30px;
 padding: 2px 2px 5px 2px;
 margin: 0px 0 0x 0px;
 border-radius: 5px;
-moz-border-radius: 5px;
 -webkit-border-radius: 5px;
 cursor:pointer;
display: inline;
}
</style>
<table class="rssbuttontable"><tr><td><a rel="nofollow" href="http://feeds.feedburner.com/lordhtml"><img src="http://feeds.feedburner.com/~fc/ lordhtml ?bg=FF6600&amp;fg=444444&amp;anim=1" height="26" width="88" style="border:0" alt="" /></a></td><td><input value="Subscribe to Get Updates" class="Subscriberssbutton" type="button" onclick="window.openundefined'http://feedburner.google.com/fb/a/mailverify?uri= lordhtml ', 'popupwindow', 'scrollbars=yes,width=650,height=570');return true"></td></tr></table>

Customization


Replace lordhtml With your feedburner User name.I already highleted lordhtml with red color in code.


Comment is best way to say thanks.

Saturday, 26 May 2012

Feedburner Feed Count Widget For Blogger


Hey friends today I will show you how to add feed burner feed count button to blogger.Its very necessary to show this to your blog home page it will help your blog to show off, I am also using this widget you can see at left of this blog.

This badge is provided by feedburner but I will provide you quick code by which you can easily put this badge in your blog.


To add this blog to your blog just copy the following code and paste it in your blog Html/JavaScript


<center><p><a href="http://feeds.feedburner.com/lordhtml"><img src="http://feeds.feedburner.com/~fc/lordhtml?bg=000000&amp;fg=ffffff&amp;anim=1" height="26" width="88" style="border:0" alt="" /></a></p></center>

Replace LordHtml with your feed burner username.

Now Save It. Short But useful Tutorial :) 

Monday, 7 May 2012

Pop Up Email Subscribe Box For Blogger


Many good website is having a email subscribe window which appears when any new visitor enters to the website. Today I will teach you how to make that pop-out box for your blog.The main thing about this widget that it is very smooth and cool with jquery effect.This pop up will appear once in a seven days to that specific visitor so that it will not irritate your readers daily.This will help you to increase your number of RSS subscription.


To Add This Subscription Box To Your Blog Just Copy Below Code And Paste It in HTML/Javascript.

<link rel="stylesheet" href="http://helperblogger.webs.com/colorbox-css-code-helperblogger.css" />
<style>

#subscribe {
    font: 12px/1.2 Arial,Helvetica,san-serif;
    color: #666;
    height: 355px;
}


#subscribe a,
#subscribe a:hover,
#subscribe a:visited {
    text-decoration: none;
}


.box-title {
    color: #F66303;
    font-size: 20px !important;
    font-weight: bold;
    margin: 10px 0;
    border: 1px solid #ddd;
    -moz-border-radius: 6px;
    -webkit-border-radius: 6px;
    border-radius: 6px;
    box-shadow: 5px 5px 5px #CCCCCC;
    padding: 10px;
    line-height: 25px;
    font-family: arial !important;
}


.box-tagline {
    color: #999;
    margin: 0;
    text-align: center;
}


#subs-container {
    padding: 35px 0 30px 0;
    position: relative;
}


a:link, a:visited {
    border: none;
}


.demo {
    display: none;
}
</style>
<script src='http://ajax.googleapis.com/ajax/libs/jquery/1.5/jquery.min.js'></script>
<script src="http://helperblogger.webs.com/files/jquery.colorbox.js"></script>
 <script type="text/javascript">
jQuery(document).ready(function(){
if (document.cookie.indexOf('visited=true') == -1) {
var fifteenDays = 1000*60*60*24*7;
var expires = new Date((new Date()).valueOf() + fifteenDays);
document.cookie = "visited=true;expires=" + expires.toUTCString();
$.colorbox({width:"390px", inline:true, href:"#subscribe"});
}
});
</script>
<!-- This contains the hidden content for inline calls -->


<div style='display:none'>
<div id='subscribe' style='padding:10px; background:#fff;'>
<style> .home-featured-right {
    background: url(http://demo.studiopress.com/balance/wp-content/themes/balance/images/dashes-bg.png) #d05353;
    border: 5px solid #fff;
    font-size: 16px;
    margin: 0px;
    width: 320px;
    font-family: calibri;
}


.home-featured-right,
.home-featured-right p,
.home-featured-right h4.widgettitle {
    color: #fff;
    text-shadow: #a64242 -1px -1px;
    text-align: center;
}


.home-featured-right p {
    font-size: 16px;
    margin-bottom: 20px;
}


.home-featured-right .widget {
    margin: 35px;
}


.home-featured-right h4.widgettitle {
    font-size: 26px;
    margin-bottom: 20px;
}


.home-featured-right input[type=text] {
    -moz-box-shadow: inset 0 1px 2px 1px #eee;
    -webkit-box-shadow: inset 0 1px 2px 1px #eee;
    background: #fff url(http://demo.studiopress.com/balance/wp-content/themes/balance/images/email-icon.png) no-repeat 16px 15px;
    border-bottom: none;
    border-left: 1px solid #963c3c;
    border-right: none;
    border-top: 1px solid #963c3c;
    box-shadow: inset 0 1px 1px 1px #eee;
    color: #000;
    font-family: Verdana, Arial, Tahoma, sans-serif;
    font-size: 12px;
    padding: 14px 15px 14px 45px;
    width: 180px;
}


#home-featured .home-featured-right input[type=submit] {
    background: url(http://demo.studiopress.com/balance/wp-content/themes/balance/images/email-button.png) no-repeat !important;
    border: none;
    font-size: 0;
    height: 28px;
    margin: 0 0 0 15px;
    line-height: 0;
    text-indent: -9999px;
    width: 26px;
}


#email-news-subscribe .email-box {
    padding: 5px 10px;
    font-family: "Arial","Helvetica",sans-serif;
    border-top: 0;
    border-image: initial;
    height: 35px;
    margin-left: -20;
}


#email-news-subscribe .email-box input.email {
    background: #FFFFFF;
    border: 1px solid #dedede;
    color: #999;
    padding: 7px 10px 8px 10px;
    -moz-border-radius: 3px;
    -webkit-border-radius: 3px;
    -o-border-radius: 3px;
    -ms-border-radius: 3px;
    -khtml-border-radius: 3px;
    border-radius: 3px;
    border-image: initial;
    font-family: "Arial","Helvetica",sans-serif;
}


#email-news-subscribe .email-box input.email:focus {
    color: #333
}


#email-news-subscribe .email-box input.subscribe {
    background: -moz-linear-gradient(center top,#FFCA00 0,#FF9B00 100%);
    background: -webkit-gradient(linear,left top,left bottom,color-stop(0,#FFCA00),color-stop(1,#FF9B00));
    background: -moz-linear-gradient(center top,#FFCA00 0,#FF9B00 100%);
    -pie-background: linear-gradient(270deg,#ffca00,#ff9b00);
    font-family: "Arial","Helvetica",sans-serif;
    border-radius: 3px;
    -moz-border-radius: 3px;
    -webkit-border-radius: 3px;
    border: 1px solid #cc7c00;
    color: white;
    text-shadow: #d08d00 1px 1px 0;
    padding: 7px 14px;
    margin-left: 3px;
    font-weight: bold;
    font-size: 12px;
    cursor: pointer;
    border-image: initial;
}


#email-news-subscribe .email-box input.subscribe:hover {
    background: #ff9b00;
    background-image: -moz-linear-gradient(top,#ffda4d,#ff9b00);
    background-image: -webkit-gradient(linear,left top,left bottom,from(#ffda4d),to(#ff9b00));
    filter: progid:DXImageTransform.Microsoft.Gradient(startColorStr=#ffffff,endColorStr=#ebebeb);
    outline: 0;
    -moz-box-shadow: 0 0 3px #999;
    -webkit-box-shadow: 0 0 3px #999;
    box-shadow: 0 0 3px #999
        background:-webkit-gradient(linear,left top,left bottom,color-stop(0,#ffda4d),color-stop(1,#ff9b00));
    background: -moz-linear-gradient(center top,#ffda4d 0,#ff9b00 100%);
    -pie-background: linear-gradient(270deg,#ffda4d,#ff9b00);
    border-radius: 3px;
    -moz-border-radius: 3px;
    -webkit-border-radius: 3px;
    border: 1px solid #cc7c00;
    color: #FFFFFF;
    text-shadow: #d08d00 1px 1px 0
}  
</style>


<div class="home-featured-right">
    <div id="enews-2" class="widget enews-widget">
        <div class="widget-wrap">
            <div class="enews">
                <h4 class="widgettitle">Sign Up for Free Email Updates</h4>
                <p>Get our latest updates direct in your inbox.Just enter your email address
                    below....</p>
                <p>Your privacy and email address are safe with us!</p>
                <div id="email-news-subscribe">
                    <!-- Email Subscribe -->
                    <div class="email-box">
                        <form action="http://feedburner.google.com/fb/a/mailverify" method="post"
                        target="popupwindow" onsubmit="window.openundefined'http://feedburner.google.com/fb/a/mailverify?uri=lordhtml', 'popupwindow', 'scrollbars=yes,width=550,height=520');return true">
                            <input class="email" type="text" style="width: 150px; font-size: 12px;"
                            id="email" name="email" value="Enter Your Email here.." onfocus="if(this.value==this.defaultValue)this.value=&#39;&#39;;"
                            onblur="if(this.value==&#39;&#39;)this.value=this.defaultValue;" />
                            <input type="hidden" value="lordhtml" name="uri" />
                            <input type="hidden" name="loc" value="en_US" />
                            <input class="subscribe" name="commit" type="submit" value="Subscribe"
                            />
                        </form>
                    </div>
                </div>
            </div>
        </div>
    </div>
</div>
<!-- end .home-featured-right -->
<div style="background: #fff;padding: 1px 8px 1px 3px;text-align: right;border-image: initial;font-size:10px;font-family: "arial","helvetica",sans-serif;"> <!-- Don't remove the credit links,If you removed credits then your gagdet will not work --><span class="author-credit" style="font-family: Arial, Helvetica, sans-serif;"><a href="http://goo.gl/vfQVM" target="_blank" >Get This �</a></span></div></div>
</div>

Replace lordhtml with your feedburner username.Now save your gadget and you are done.


Monday, 19 March 2012

How To add Read More In Feedburner Feeds for blogger.


If you recently join feedburner then you got problem when you see your feed without "jump break", Jump break or Read more button whatever you say it make your blogger feed look good.Read more button also help to redirect from feed page to original blog page.It is very simple to add read more button to feedburner feeds.It doesn't required any type of html or Css knowledge.

Read more �

How To Add Feedburner Subscription Box To Blogger.

Feedburner is very famous among blogger.Email subscription gadget is already introduced by blogger.But that is not so good looking and small also.You can put good email subscription box to blogger this gadget is provided by feedburner.

Read more �

Sunday, 18 March 2012

How to add your feedburner url to blogger.

Adding feed burner URL to blogger is very simple work and it is very important to setup your blog with feed burner by which user can read directly your post on Google feed burner.As I show you in my previous tutorial that "How To Create blog feed with feedburner" but i forgot to show you about "How to add your feedburner url to blogger".
Read more �

Friday, 16 March 2012

How To Create blog feed with feedburner.


Feedburner is a free service provided by Google.It is very important for any site because by this site get more traffic.If a visitor subscribe your site with feedburner then when you write the new post user get email in there Inbox.More the subscriber you have more traffic your site will get.

Read more �